Building an Alfresco close to your boundary line
YES, YOU CAN build your dream alfresco outdoor room right to the boundary.
This is a confusing & often frustrating design element for clients & sometimes just to make it all the more complicated, you can often find yourself obtaining different advice depending on where you look.
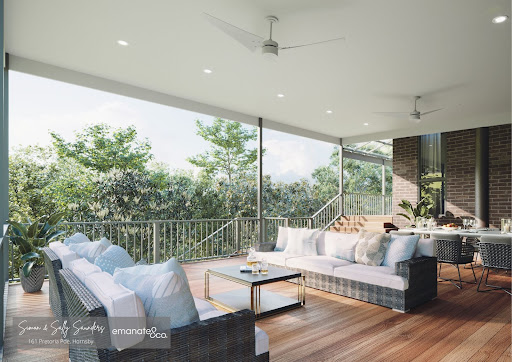
Picking up some additional floor space & therefore looking to go all the way to the boundary can be critical when bringing all of the elements together to create your ideal alfresco outdoor entertaining space.
It could be that you live in Sydney’s inner city suburbs, where the blocks are traditionally long & narrow, or you be one half of a townhouse with a common dividing wall.
Both scenarios make perfect sense for you to effectively steal some additional space, otherwise, it could make it infeasible for you to fit your table setting or outdoor kitchen into the alfresco room area.
A key point to keep in mind when designing your alfresco outdoor living space for your home is that you not only need to evaluate your Local Council’s Development Control Plan (DCP) but the National Construction Code (NCC).
Both documents work together & you need to ideally evaluate both in the early stages of the design process.
”We apply to Outdoor Rooms the architectural-style thinking
that uncovers your needs & your tastes...
then get the details right.
Unfortunately, I see a lot of clients who try to complete this design & approval process themselves; not necessarily ignoring but just being unaware that you need to show compliance with both documents.
Too often, a poor design has come across my desk where only half the work has been done by a seemingly credible designer, where one element of compliance has been omitted.
This has meant that we have had to strip back the design, and take the client back through our process – effectively take a step back to take steps forward. Unfortunately, this also means additional costs & time have been added to the process which ultimately wasn’t really needed if only the right resources/people were consulted early in the process.
Every Local Council has different building design requirements & these can differ within certain areas or even streets within your multiplicity, so don’t presume that the rules that have applied to your friend’s home on the other side of town will necessarily apply to you.
Your local council will outline setback requirements for your new build to the:
- Front boundary,
- Side boundary, and
- Rear boundary.
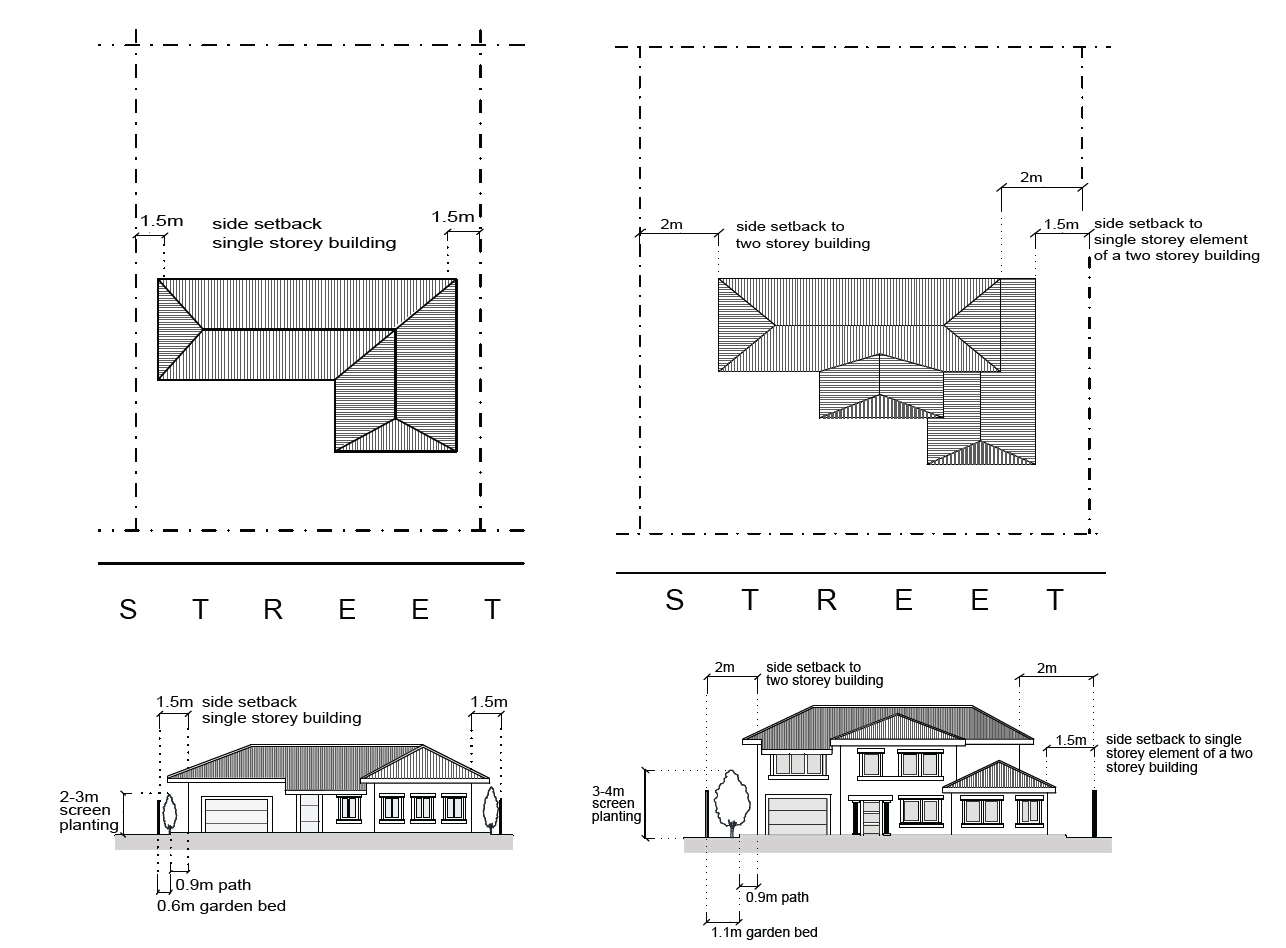
They will then have different requirements for different building types – Residential vs Industrial an example; as well as different requirements depending on the building height & just to throw a cherry on top, it can then change depending on your street type.
Street type? Yes, building setbacks will differ again if you are in a battle-axe block vs a home with a primary frontage vs a secondary boundary.
Each council will then have allowances for “possible encroachments into building setbacks”, which can be things such as driveways, stairs & fences.
But these encroachments don’t help you entertain outdoors very well.
As a very general rule of thumb, you need to work to a Council side boundary setback requirement of 900mm.
But what about Exempt & Complying Development Consent (CDC)?
Stop – it just doesn’t work if you want to go any closer than 900mm to your boundary line.
(**How long is 900mm?? Think of the ‘ye old school 1-meter ruler that the teacher used on the chalkboard & take a fraction off that.
Try & explain this to your kids & see it just wash over them as they have absolutely no idea what you are talking about!)
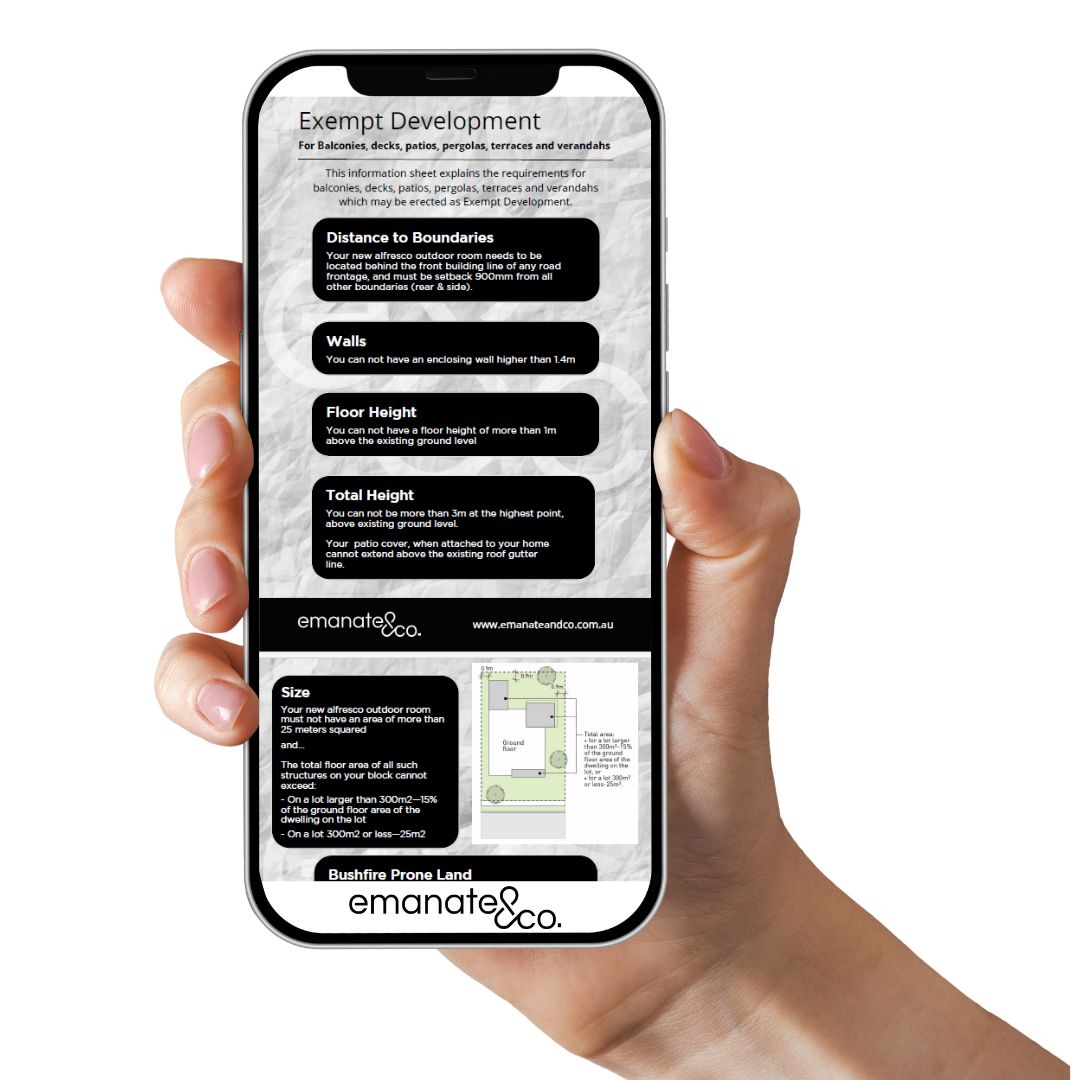
You have to remember that both Exempt Development & Complying Development Consent are effectively a checklist. They are both black & white.
You could be ticking every box on the Exempt checklist…
- Height….tick
- Size…tick
- Floor height…tick. You start to grin, quietly confident, you could be on a win here.
- Must be located from the lot boundary by at least 900mm. You are out. Game over.
You need to be able to comply with all elements of the regulations. Too often I see people only picking one or two elements (for example the 25 mtr sq rule) & thinking they are then right to proceed.
Want to double-check for yourself? Download the free Exempt Development checklist here.
So, in this case, if you fail to meet the Exempt & CDC requirements for your deck & patio cover you must go through your Local Council for Development Consent.
I hear a heavy sigh. The inspiration drawings might have even been thrown off the desk in sheer frustration.
“It shouldn’t be this hard!”
It doesn’t have to be; you just need a good (I’d say great) team around you to guide you effectively through the process.
Have a look HERE in this example of how we obtained approval through one of Sydney’s hardest councils in this beautiful outdoor living area.
Let’s look at this real-life example, where the client approached us a little frustrated, confused & almost ready to throw the towel in.
They had taken quite a bit of time, consulted with numerous designers & builders – had even gone through a DA process at the council to get approval, but were left feeling underwhelmed.
They knew they weren’t getting what they wanted.
Let’s look at this a little closer & start at the beginning….
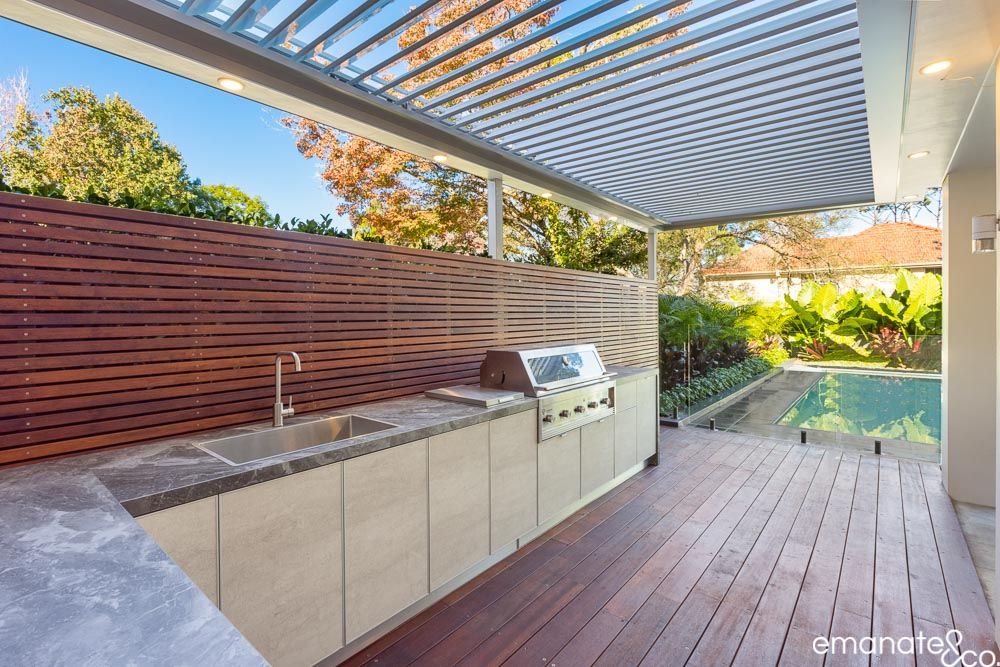
What was their issue? They had a space with no cover, where they couldn’t entertain outdoors comfortably near the pool – they had to rely on the weather to be perfect to venture outdoors to enjoy the space.
They simply wanted a covered outdoor alfresco space, with an outdoor kitchen, that tied back into the home – it couldn’t be a “slap on” afterthought that looked like no thought had been put into it & you could tell it was done yesterday.
They were also located in a high bushfire zone – BAL FZ, which limited them in terms of materials that they could use for the project. >
Are you in a BAL zone? If so, read more HERE
“Simpler can be better in terms of design.”
Their existing hard surface surrounding the pool, because of the slope of the block actually went right up to the side boundary & had a solid concrete hip-height wall running along where traditionally a side fence would be.
The council-approved design had the roof & kitchen sitting off this side boundary with a garden bed behind it.
As a result of the garden bed being placed in a relatively tight space, key square meters would be lost – plus how hard would it be to maintain the garden behind the outdoor kitchen?
The design wasn’t stacking up.
So what did we do? We made a few relatively small changes:
- We simplified the design. We kept the roof flat which didn’t overpower the smallish area, if we were to say try & include a gable-roofed structure.
Sometimes, simpler can be better – READ MORE ABOUT simple designs HERE. - We pushed out the roof & kitchen so it was hard up against the side boundary
We could get compliance through the NCC/National Construction Code by using a noncombustible & fired-rated walling product.
This was a big win as we deleted the small garden bed & effectively won back some usable space.
The wall against the boundary could then house the rangehood for the outdoor kitchen & would be rendered to match the rest of the frame/perimeter to the louvered outdoor cover.

We also did our homework.
By pushing the side of the alfresco area out to the side boundary we knew that this would be breaking the Northern Beaches Local Council requirements. However, we evaluated the situation & environment of the location, including the neighboring residence.
How would this impact them? The immediate neighbor is set considerably lower due to the fall of the land, plus there is considerable vegetation along this boundary section – both factors minimize the impact of the new alfresco area.
So after initial consultations with our Town Planner, we agreed that we should be able to successfully obtain approval through the council – which we did!
But remember – we did that ‘homework’ or investigations early in the piece.
This is a relatively newly built Dual Occupancy property located in Denistone.
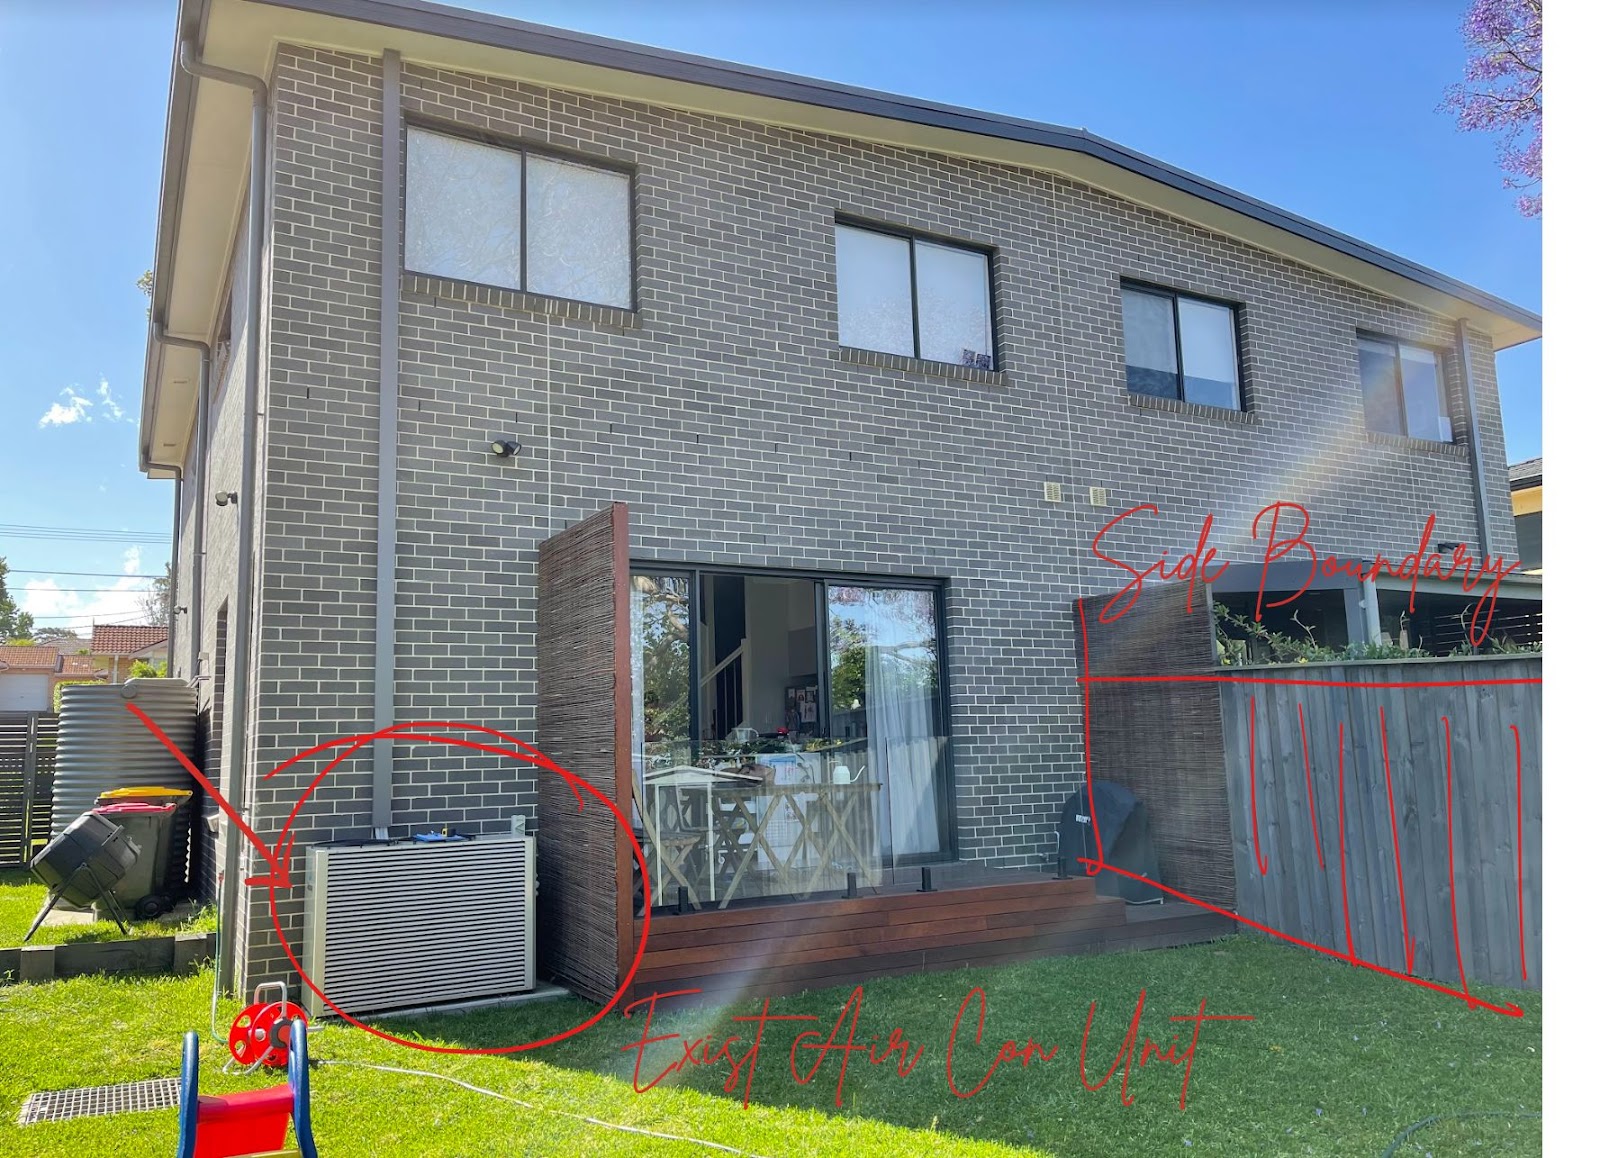
The owners had no outdoor living space for their young children & the small landing basically only provided an entrance to the backyard with no space for a BBQ – it was small & pokey.
The constraints here were working within the parameters of the side boundary & then also between the existing air conditioning unit.
If we were to bring in the side of the alfresco outdoor room by the required 900mm it would really impact the size of the area, and also start to impede the existing sliding door.
So here in this example that 900mm to the side common boundary was critical to making this design work. We could get compliance through the NCC/National Construction Code by using a noncombustible & fired-rated walling product.
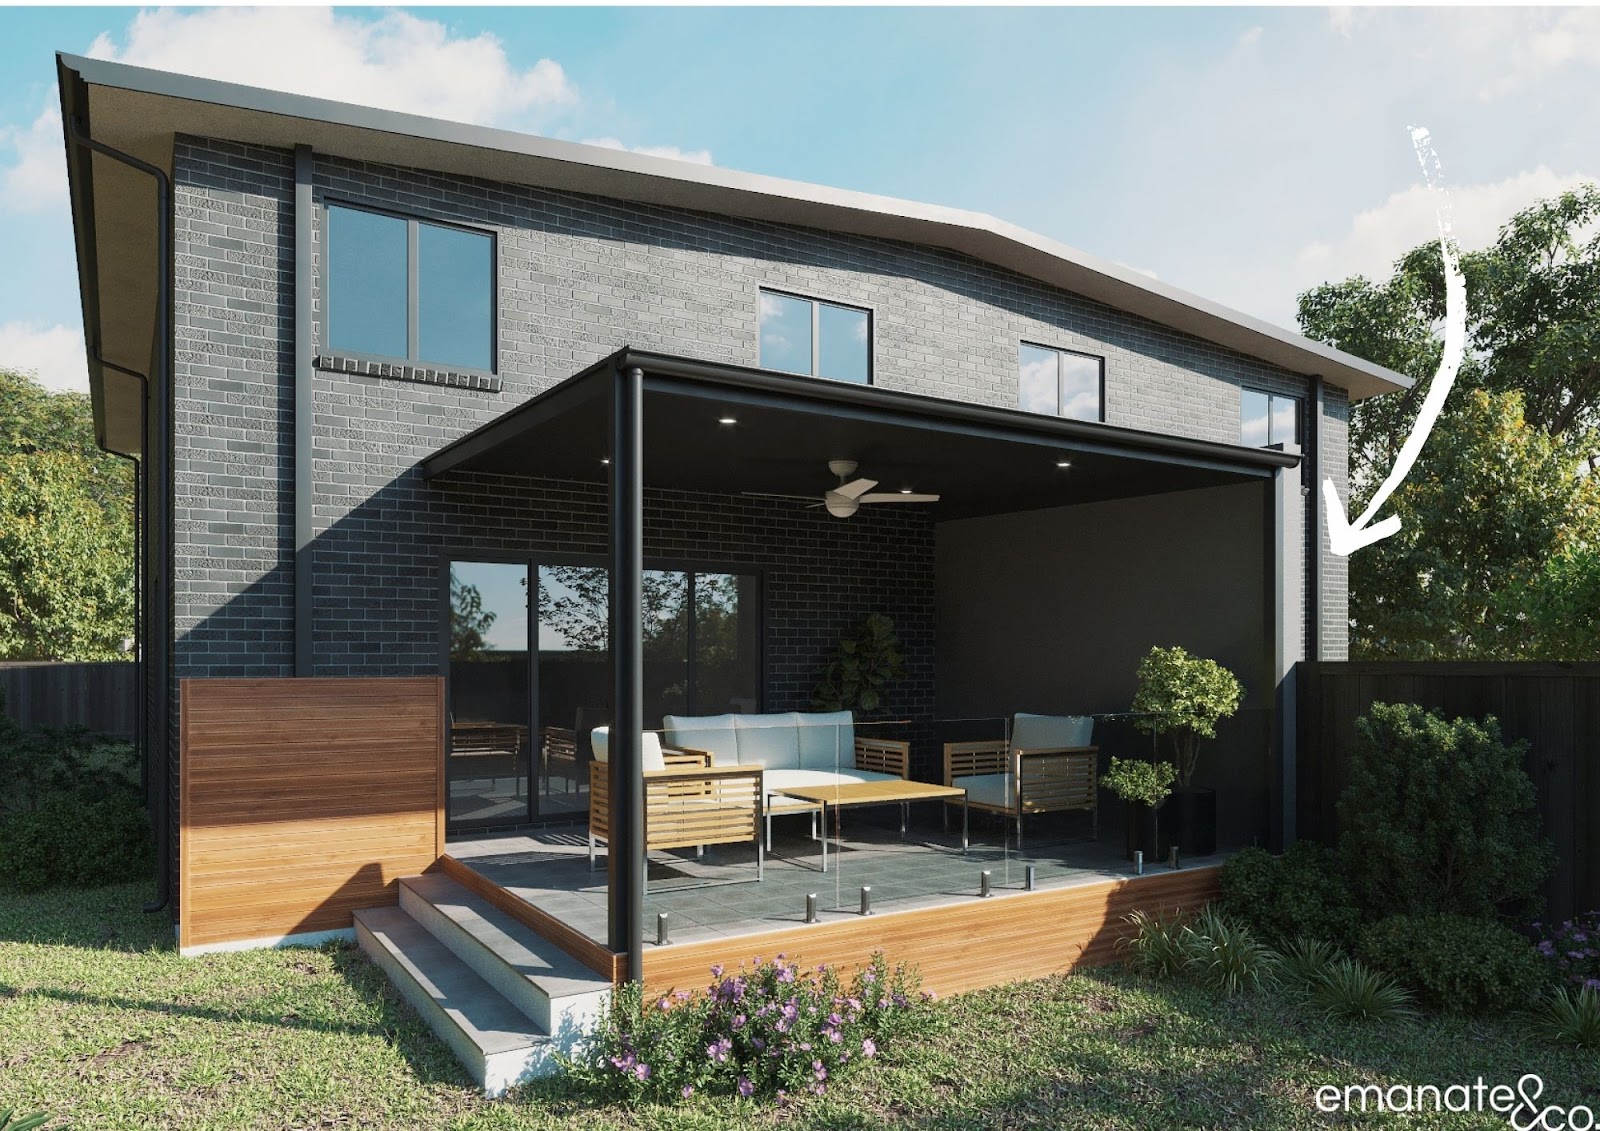
Below is the 3d render that we presented to our client to show them the potential finished result before we’ve even started. This helps our clients a lot by taking away the guesswork – they don’t need to rely on the image in their minds as they can see it right there in front of them.
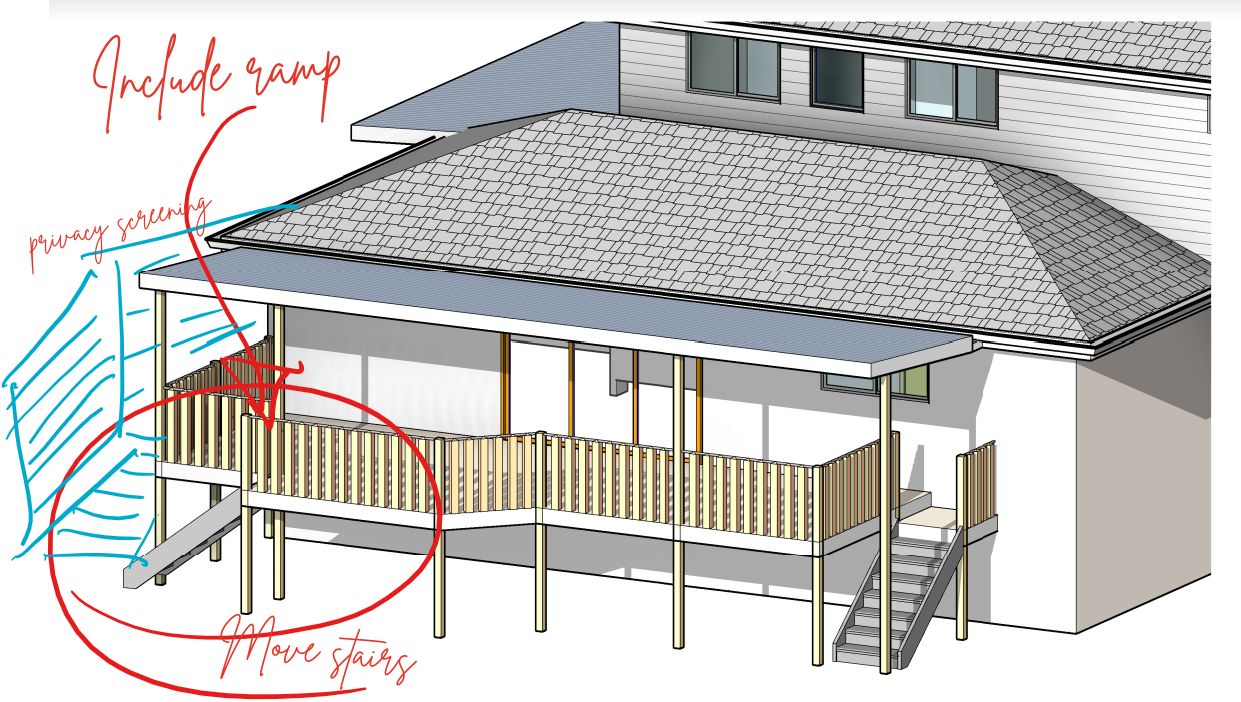
We were approached by our client with this basic design which they had sourced elsewhere but found they were stuck in the project on a number of fronts.
Access & maneuverability from the internals of the home, not only out to the deck area but then down to the pool were key.
The set of stairs on the left-hand side was a sticking point.
In the end, we thought that these were taking up ‘key real estate to the main deck/patio cover area. By moving this access point down the side of the property we could win back a couple of square meters of floor space back to the main deck.
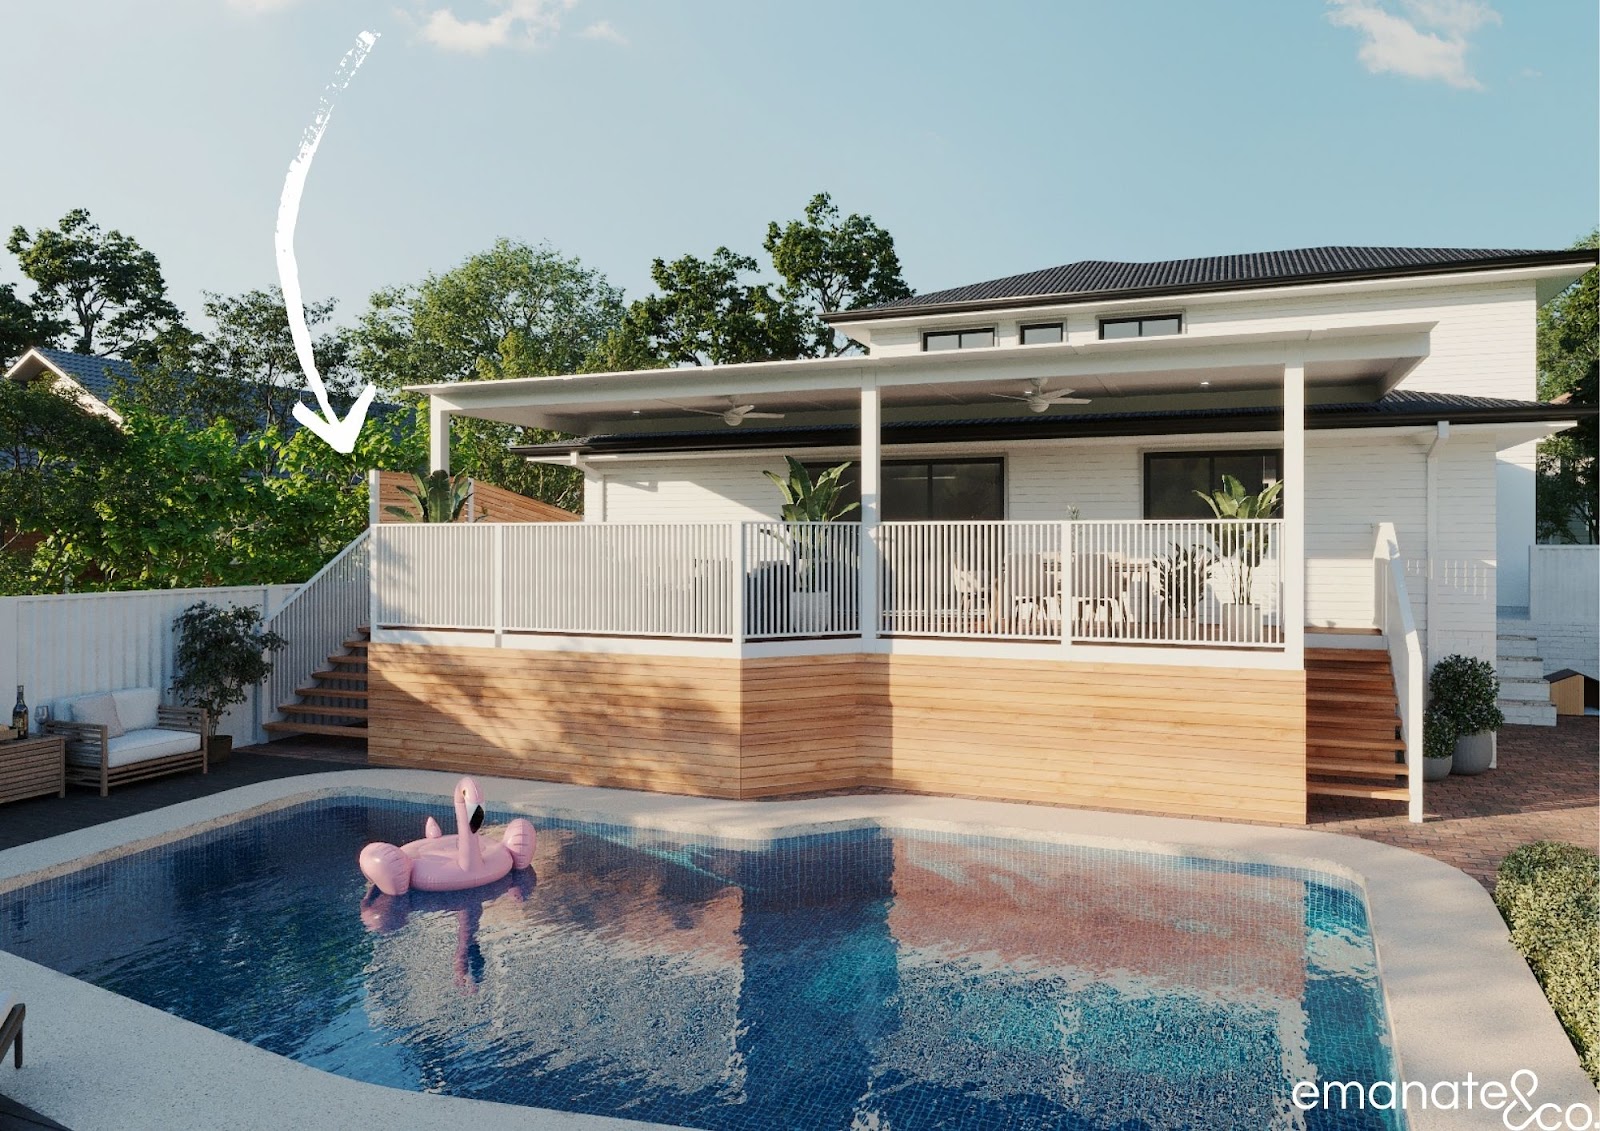
In this example, we are going right to the side boundary but more in an access & ‘flow’ perspective rather than let’s push this out to get more floor space for the outdoor kitchen.
We were able to make this work from a compliance point of view by referencing the National Construction Code (NCC) where we can go right up to the side boundary for “unroofed terraces, landings, steps and ramps, not more than 1 m in height.”
We highlighted this in the Development Consent to council & included the screening along the boundary to assist in privacy between the two neighbours.
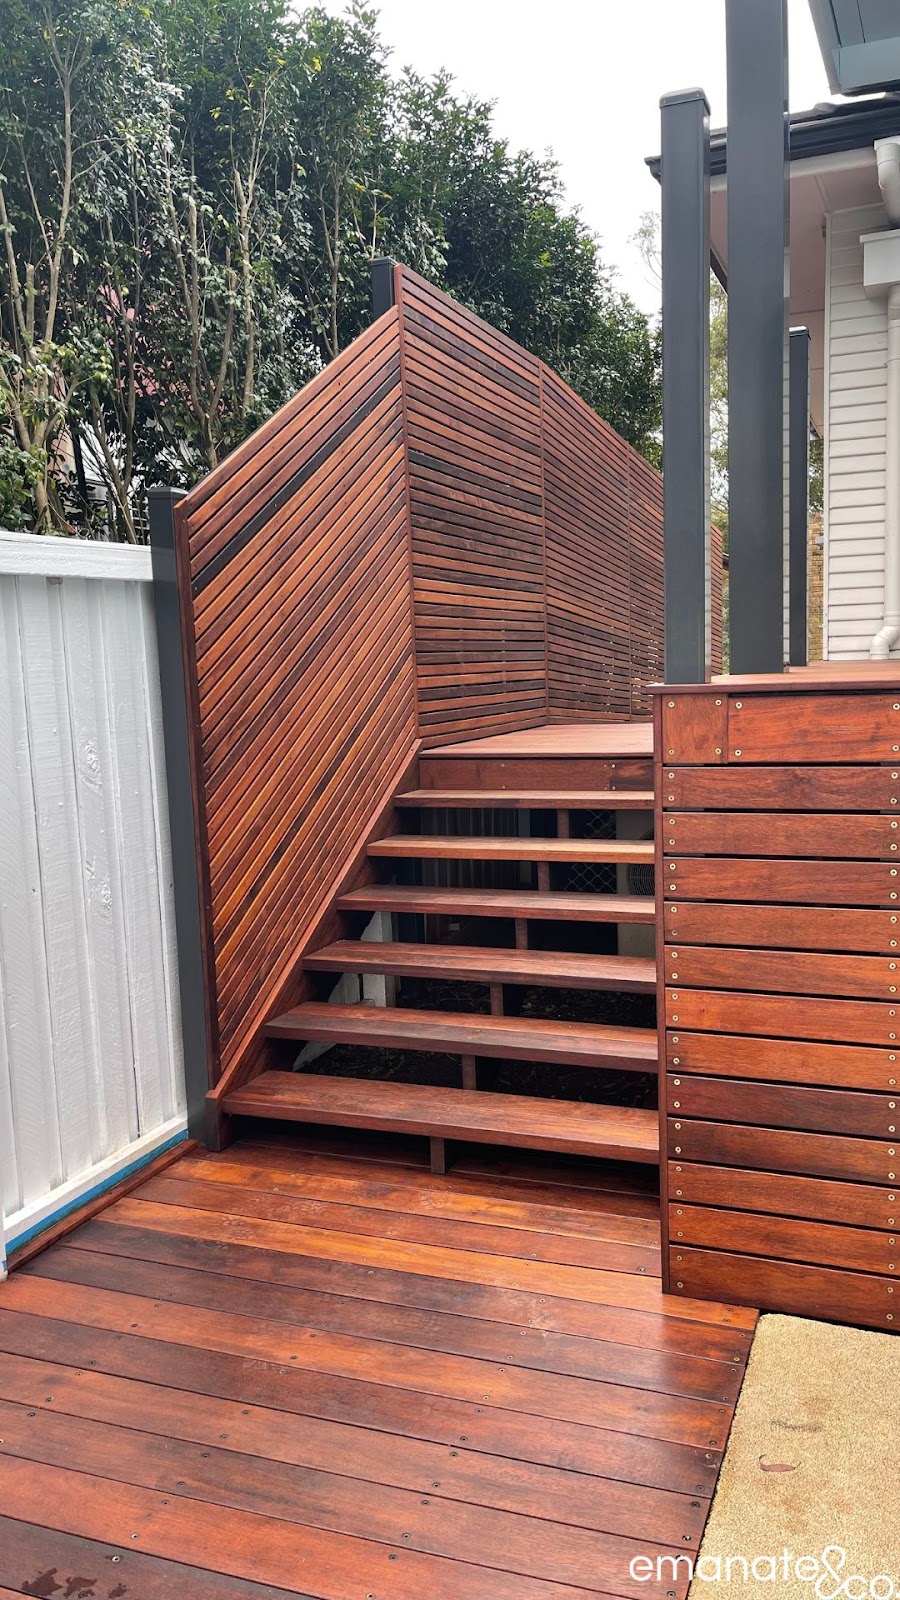
We’ve made a few tweaks to the original 3d render image (above) that we presented to our clients.
The mid construction photo below shows the freshly oiled hardwood that we ended up replacing around the pool, along with extending the side privacy screening all the way to the base of the stairs.
Wrap up…
I can almost hear the sigh of relief, knowing that you can pinch that little bit of extra space for your alfresco area.
That could mean the difference between adding the outdoor kitchen or getting the ideal table that would mean that everyone could sit comfortably.
Just remember the following:
-
-
- Do your homework early Don’t just presume that it can happen for you. Every home & local council is different. Get the right designer &/or town planner around you early in the thought process. That way you don’t go down one road only to find out its a dead end.
- Remember that your costs will change Not only are you adding additional space, which means more flooring & roofing, but you could be adding walling & the like. All of this will add cost to the project, especially ‘fire walls’ – so ensure that you have made the allowance in the budget.
-
What else could help you??
-
- Podcast – here Adrian interviews industry leaders in ‘Out the Back Door’, which is a podcast that gets you in front of some industry experts to give you the best advice about all things building in your backyard.
Listen Here - Get some inspiration through our Case Studies
Have a look here at our previous works to get some ideas. - Have a look at this Outdoor Room journey. This is a beautiful alfresco room we’ve created for this family which has essentially added a whole new element to their home.
Have a closer look at this transformation here
- Podcast – here Adrian interviews industry leaders in ‘Out the Back Door’, which is a podcast that gets you in front of some industry experts to give you the best advice about all things building in your backyard.