How we transformed this deck into an Outdoor Room
How we transformed this deck into an Outdoor Room
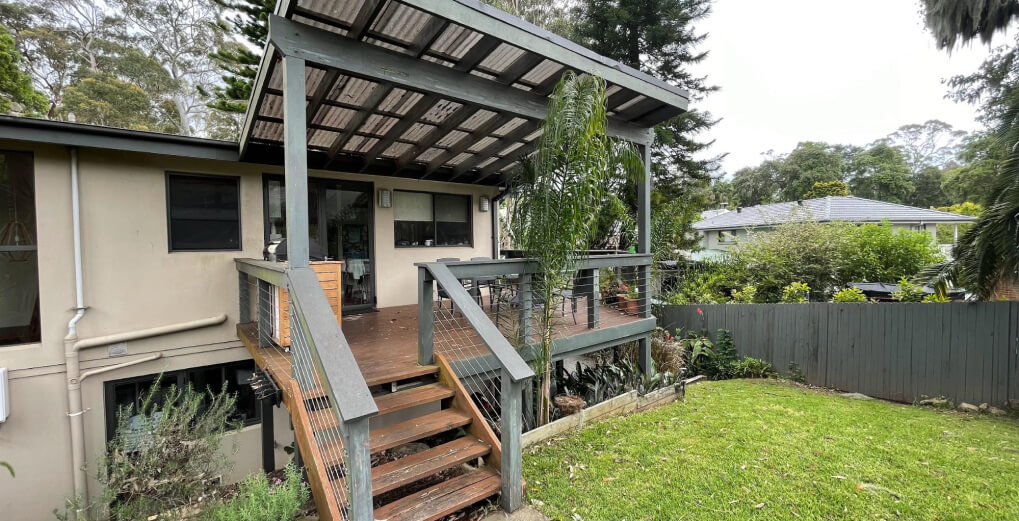
For Kim & Michael in Normanhurst, they had already completed their internal renovations, but had struggled in getting the back deck area brought back to life.
It was an old & tired space & didn’t exactly ask you to come outside & enjoy some quality time with friends or family.
They had spoken to a number of builders but hadn’t found the business they felt comfortable with that could complete their vision and also couldn’t find the one person to handle the full process.
They knew an approval was required, but didn’t want to tackle that or even know how. Some people would only handle the deck, others then would only do the roof but they had to find their own electrician. They were becoming frustrated – surely there would be one business that could handle it all??
They also had their daughters 21st birthday coming up & they knew the existing deck & patio cover would just not cut the mustard. They were probably more worried that they would fall through the deck.
On top of that the patio cover roof was badly constructed which meant that they had significant leaking right against the back door.
The polycarbonate roof wasn’t working on a number of fronts – the excessive framing made the structure very top heavy and the plastic roofing meant that the area not only didn’t look the best with all of the leaf debris on top but it enabled the heat to transfer through. Have a look at the video below, as to why we don’t use polycarbonate.
A Design Process that brought the idea to life right at the beginning:
Are these the questions that the little voice is asking you in your head?
“What will the final result look like?”
“What if it doesn’t look like the picture I have in my head?”
“Will the colours work?”
“I hope it won’t look cheap & nasty?”
What if you stuff it up,ahhhhhhhh!! It’s almost too hard.
Or is it…?
So, to help give our clients clarity & confidence, we include this 3D render as part of our initial Design Consultation Process which means that no stone is left unturned & you can enjoy the process moving forward.
Have a look HERE at some before & after 3d render examples.
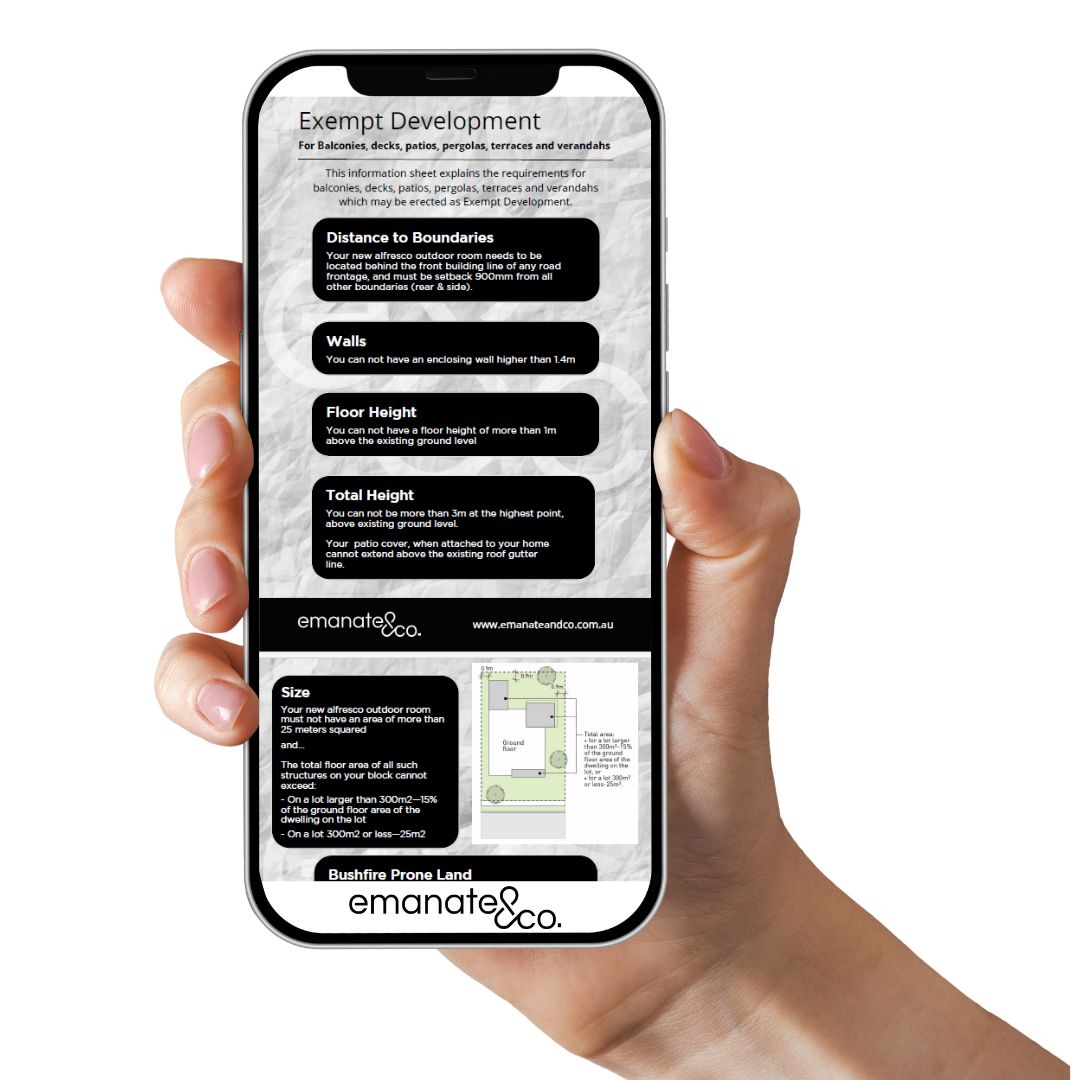
Fast Council Approval…
Approval obtained in 56 days!
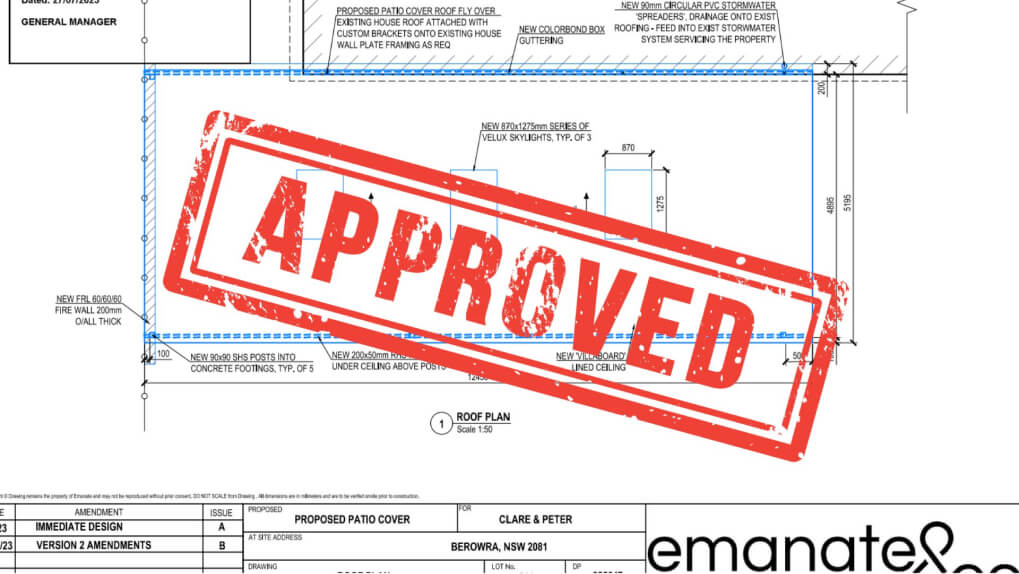
Overwhelmed by the prospect of assembling numerous reports and plans for their alfresco living space, Kim & Michael found relief in our streamlined end-to-end process. Instead of navigating a daunting task, they saw how our expertise transformed it into an effortless approval process.
From the first submission to receiving council approval via the NSW Planning Portal, we ensured a smooth and efficient experience, handling every detail on their behalf.
Why so quick? It’s all in our approach & process. Our team’s meticulous planning & deep understanding of the local regulations ensure a smooth process every time.
We took away all of the stress & uncertainty for our clients as we handled the Development Application process through Hornsby Council, which included:
- Site survey
- Drafting of architectural plans
- Statement of Environmental Report
- NSW Planning Portal lodgement
- Hornsby Shire Council liaison
- Sydney Water approval
- Construction Certificate with Principal Certifying Authority
- Basix Approval
- Mandatory PCA progress inspections
Do you need an approval for your new deck & patio cover? Read more HERE
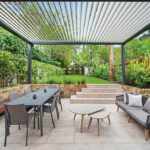
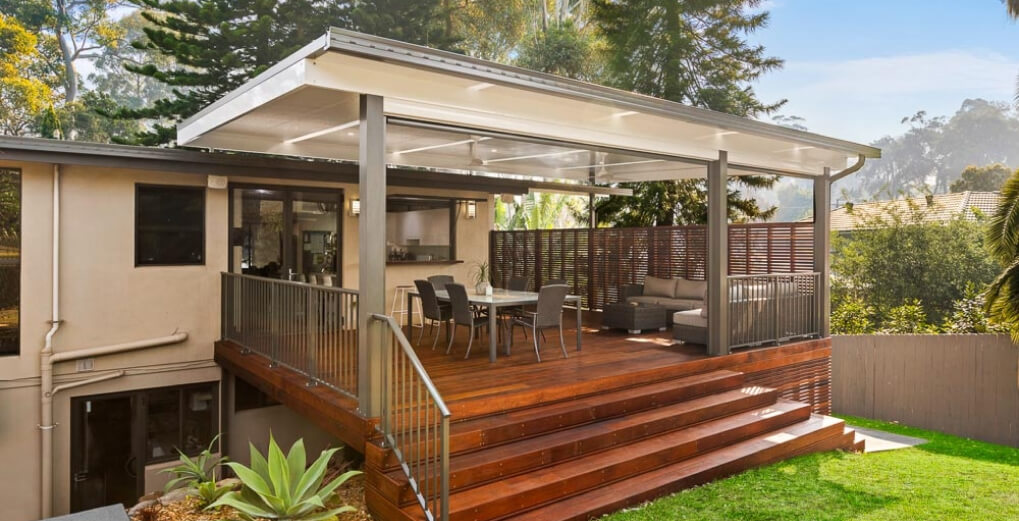
Space for multiple zones/areas
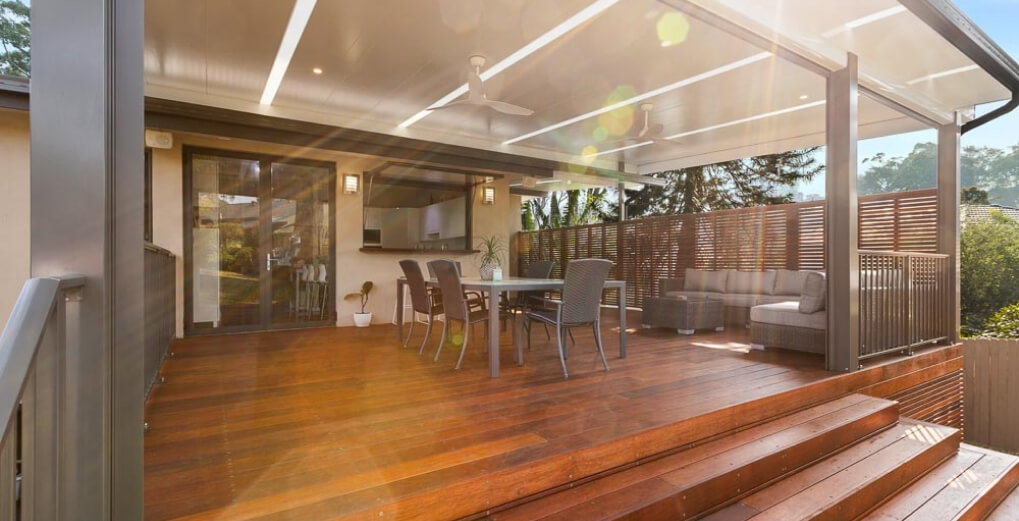
Two simple changes to the existing deck floor space area enabled the new Outdoor Room to have multiple areas.
Floor space is your “real estate” so if you have the opportunity to pick up some extra decking, even if it is only half a metre in one way we always say to take it.
We ended up pushing the space out into the backyard further & aligned the right hand side of the alfresco room with the side of the house.
Currently it was finishing a foot short of the wall corner which made it look unfinished plus it created effectively a dead spot.
Having multiple spaces within the one alfresco outdoor room is something that we are creating more of. It gives you different options & therefore a greater return on investment. Think not only having your main outdoor dining table, but an outdoor kitchen & a more casual coffee/lounge space.
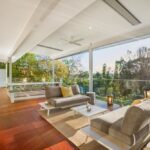
Connection & flow…
Simple things can make big differences.
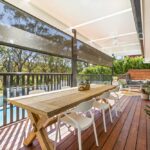
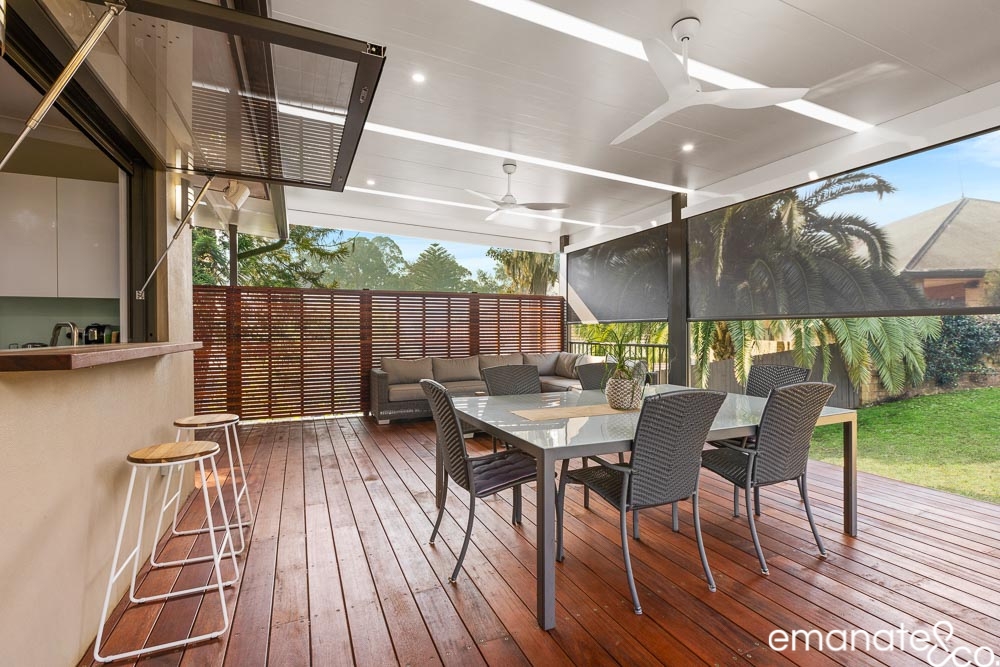
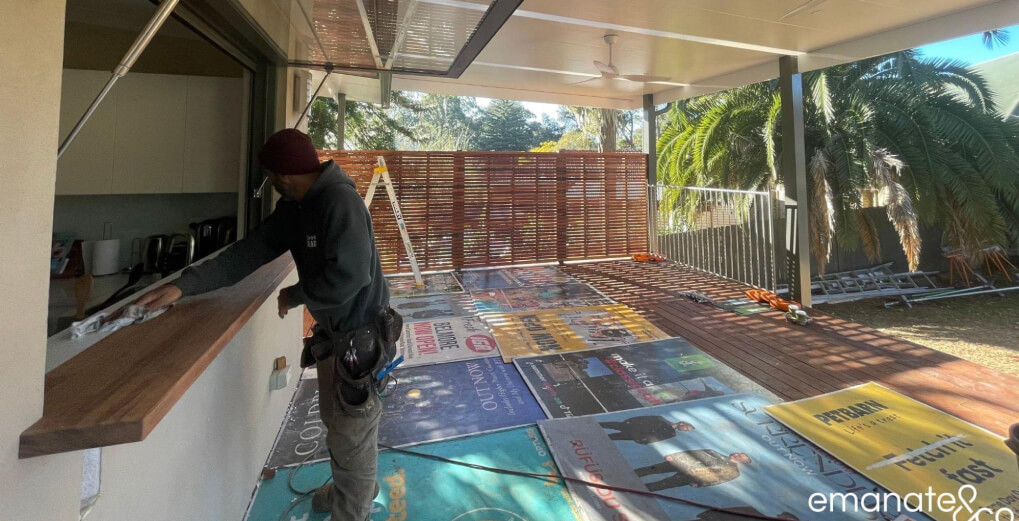
The gas strut kitchen window awning was installed with a beautiful dressed hardwood bench which gives a closer connection from the internal existing kitchen out to the their guests in their outdoor room.
We opened up the stairs leading down from the deck into the backyard so this would also minimise balustrade but will assist in getting the perfect ‘flow’ from the existing back door, through the outdoor room into the backyard.
The stairs have the hardwood decking cascading over & around so they are perfect to sit on.
Privacy:
As we had pushed out the floor area in both directions, this now meant that we were closer to the side boundary.
We anticipated a Hornsby Council requirement, we didn’t wait for the council to come back to us.
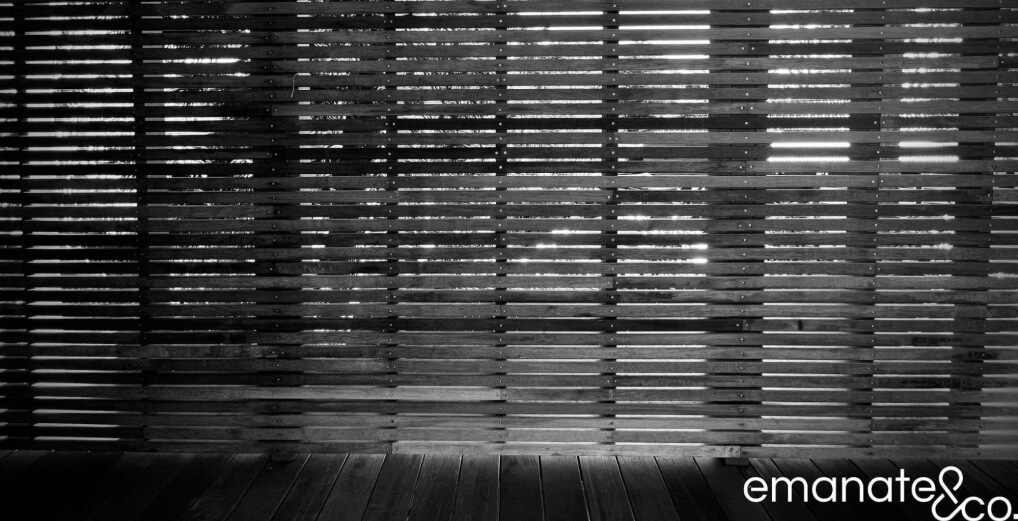
We’ve still used the same timber species on the screening as the decking but often we see people construct their privacy screening with the decking off cuts. And that’s exactly what it looks like…a patchwork quilt of bits & pieces that visually ruin the alfresco space.
These narrower Timbers still tie in with the whole aesthetic of the outdoor room, gives privacy to the space
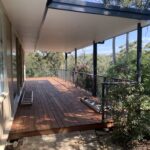
Space for storage under…
We’ve used a large steel framing system for the floor so we could maximise the space under the floor area. The strength of the steel not only gives our clients peace of mind in terms of strength & durability but also minimises deck piers underneath.
Due to the slope of the land & the set up of the house, you can quite easily walk under the deck from the lower ground area.
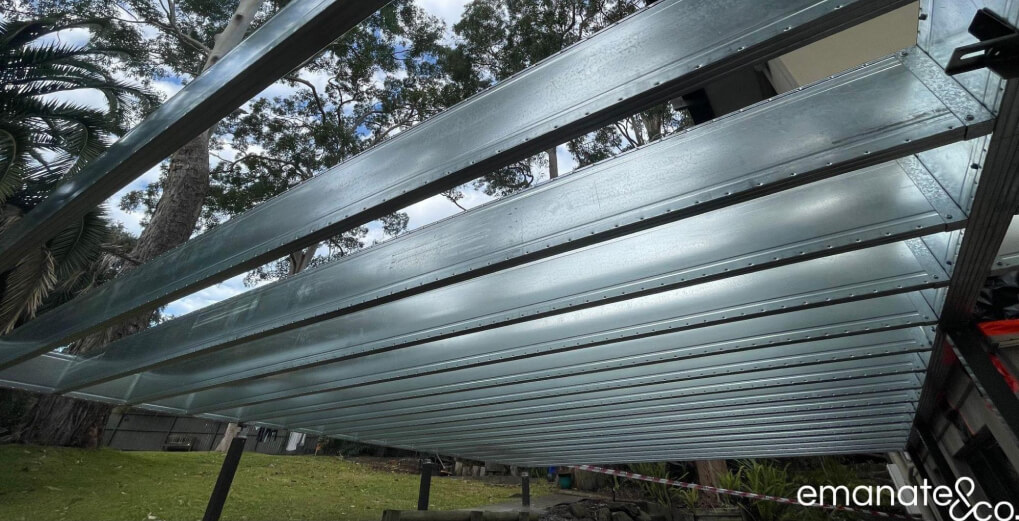
By having a clear 5150mm span for the framing, meant that Michael could install water tanks under the deck area & also have storage facilities in what otherwise would have been a dead or unused space.
Project Specifications:
Deck:
- 140mm wide Merbau hardwood decking boards
These are screw fixed down onto the steel framing
This means that you won’t get the nail heads popping up so you catch you feet on them. Ouch! We also like using the wider decking boards, especially on such a large floor space as if we used the smaller 90mm wide board, it would mean too many lines & fixings going across the floor – which will mean it will look too busy. - All of the timbers are oiled with ‘Feast & Watson’
- Steel sub floor framing
Which gave us huge spans under the flooring & minimised posts
This then meant that the owner had a bonus of an added storage space under the deck - 1000mm high powder coated, aluminium balustrade with a series of 19 x 19mm square vertical uprights
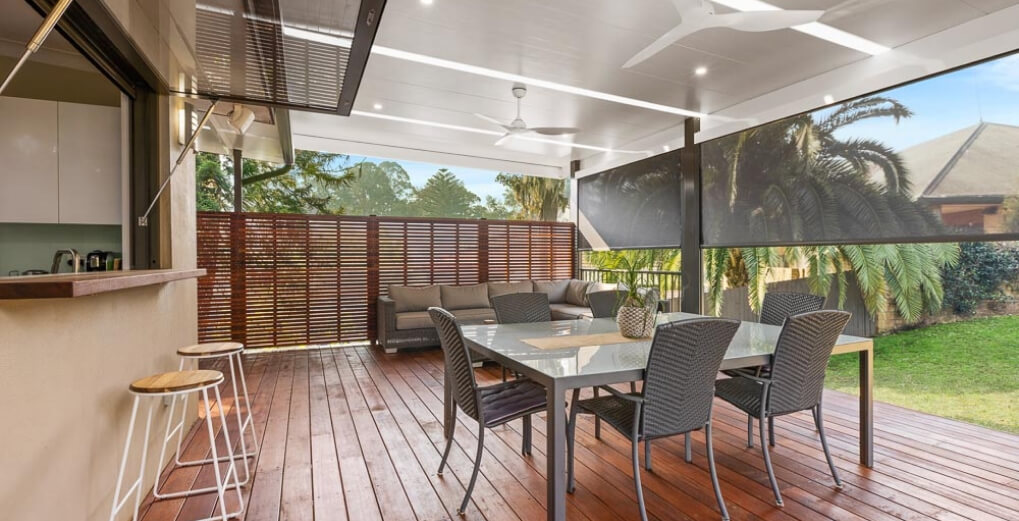
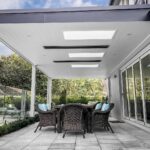
Patio Cover:
- 55mm ‘Shademaster’ insulated roofing sheets
- Series of 110mm wide ‘nature lite’ strips incorporated into the roofing sheets These let some natural light into the outdoor room area
- LED downlights
- Exterior ceiling fans
Other Bits & Pieces:
- Exterior motorised blinds with a colour matched track down each side which neatly ties it back into the rest of the structure. These are also remote controlled!
- Horizontal 42 x 19mm, pencil round ‘Merbau’ horizontal screening
Project Cost:
- $171,030 (GST incl.) (July 2023)
Plus Local Council application fees
“We recently had the pleasure of working with Emanate to construct our deck.
The professionalism and expertise of the Emanate team were commendable. They took the time to work with us on our vision for the deck and provided suggestions to enhance the design and functionality.
One of the standout aspects of working with Emanate was the impeccable workmanship on display. The deck’s construction was carried out with precision and care, resulting in a structurally sound and aesthetically pleasing deck that we know will last for years to come. The deck not only complements the overall look of our home, it also serves as a functional and inviting outdoor space for our family to enjoy year round.
Throughout the project, communication with the Emanate team was consistent. They kept us informed about the progress, any potential challenges, and were always open to discussing any changes or adjustments we wanted to make.
We are very happy with our new deck and thank Emanate for transforming it into a practical and welcoming outdoor space.”
- Kim & Michael Vandervelde; Normanhurst
The three main takeaways that we would provide from this Alfresco Outdoor Room would be…
1. Get the right size:
What table will you use? How many people will sit there? Remember that when you are entertaining all of the chairs will be kicked out from the table which will eat into your floor space.
What furniture do you want to include into the space? Where will the kitchen go?
If you have the ability to steal some extra floor space in the design, do it – this is your main real estate.
2. Consider the flow:
Design your space starting from your back door.
How will you walk through the outdoor room? Where will the table & or outdoor kitchen be?
Where will your steps go?
Mark these out in your backyard early – walk through & make sure that you are going to have to tippy toe around your family & friends in your new outdoor room.
3. Don’t forget the accessories:
These are the not so little things that people tend to cut out, but here for Kim & Michael, items such as the exterior blinds really turn this space into an outdoor room. Which creates a whole new space whether its Summer or Winter.